Friday, September 30, 2011

My Memories Suite Giveaway!


I have been trying to decide what I wanted to do on my blog to celebrate my one year anniversary as a blogger.  Just when I was about to give up on the idea of doing something special, I received an opportunity to host a giveaway!
I have always loved to scrapbook, but am never organized enough to plan out what I want to do before going to the store.  In the end I would end up with a bunch of mis-matched pieces and papers and in frustration I would just stuff it all in a bag and place it out of sight.  When I was contacted by My Memories to review their digital scrapbooking software and host a giveaway, I was thrilled.  My head began swimming with all types of projects that I could do with the software.  Just to get myself familiar with the software, I played around with some pictures of my nephew and great nephew.  Here are the results of my first creations: 


Also, I have always wanted to get all of the old family photos together and have a genealogy book made.  Guess what??? I can now do that thanks to this amazing software!  Here are what a few pages might look like in my book: 


I found the software easy to use and I liked knowing that there are instructional videos available in case I got stuck. I mean they literally have their own YouTube channel!
Since my blog is primarily focused on things I make for my home, I decided I would use the software to make a little Halloween decoration.

I am going to print this off and decoupage it onto a canvas! There really are so many ways you can use this software and I plan on continuing to show you ways that I am using it over the next few days!
Anyway, as I mentioned before....This is a GIVEAWAY!!!!One lucky person will come away with their own My Memories digital software! So, how do you enter?
There are a few ways!
1. Follow me and leave me a comment letting me know!
2. Go to the My Memories website and pick out your favorite kit. Then, leave me a comment letting me know which one you picked so I can check it out too!
3. "Like" My Memories on Facebook and then leave me a comment letting me know you did so. (By the way when you "like" their page they send you a coupon for a free kit!)
That is a total of THREE chances to win! I will randomly draw the winner on Wednesday, October 5, 2011.  
If you get to looking around and and decide you can't wait until the drawing, or your name did not get drawn there is still hope.  Just go to MyMemories.com and use the special coupon code STMMMS76968 at check out to get $10 off the purchase of the My Memories Suite digital software (the software comes with a $10 coupon for the My Memories store- for a total savings value of $20!)

Thanks for stopping in and GOOD LUCK!

Thursday, September 22, 2011

Dingy Old Cabinet Door Reinvented


I thought I would share another peek at a project I made for my workroom.  I feel like I am trying to run up a hill of quick sand when it comes to getting everything completed in my workroom.  I wanted to have a place to put all of my completed jewelry as I work to build up an inventory, but I realized I did not have anymore surface space.  While looking at the walls for the answer I noticed an old unused cabinet door that was leftover from the kitchen.  I decided that old door would be the answer to my jewelry display issues.  In my usual excitement I did not snap a shot of the door before I painted it.  Here is the process...


As you can see, I painted the cabinet door black.  For the center of the door, I decided to use part of an inexpensive lace tablecloth.  I cut out a piece that was a little bigger than the space.  I then used some spray adhesive to affix the lace to the door.  I was careful to smooth out any air pockets and to get a nice snug fit around all of the edges.  Once the adhesive dried a bit, I took my handy dandy Xacto knife and trimmed up all of the edges.  I left the hinges on the door so I could easily hang the door on the wall.  I used sterling silver flower earrings I made about a year ago to display on my new storage piece.  I actually plan on making more of these earrings to sell once I get my jewelry business up and running.  Now I really can't wait to make more pieces to proudly display and hopefully sell in the near future!


Tuesday, September 13, 2011

New Storage for Workroom

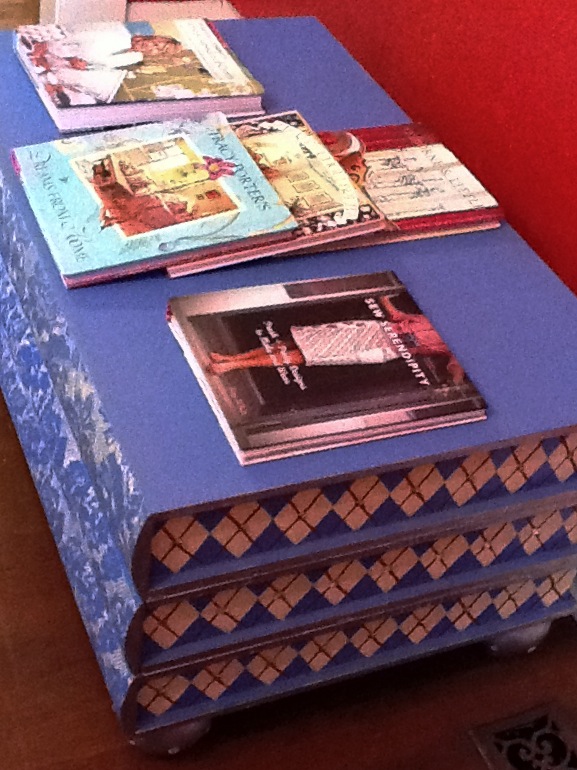
I really wish that I had before pictures of my latest project, but I had actually started the transformation before I started blogging and taking pictures did not occur to me at the time.    It was a small coffee table that looked liked old leather books stacked on top of one another.  Unfortunately, when I was home sick one day our Corgi who was a puppy at the time decided to use the edges of the table as a teething toy.  It was not pretty but I could not be mad at Sadie because I did not put her up before I entered into a cold medicine induced coma.  Anyway, instead of just chalking up the table to being completely ruined, I decided I would repurpose it. I know....big surprise....NOT!  Ok, so I guess I will stop blathering and just post some pics of the table.


I started by removing the faux leather from the table then painted a coat of primer and 2 coats of Sherwin Williams Dazzle.  I used an old lace tablecloth to paint the design on the front of the table.  I cut a diamond shape out of cardboard and traced the design onto the sides and painted the diamonds with an all purpose acrylic yellow craft paint.  Once the yellow diamonds were dried, I traced the outline of the diamond template.  I painted the lines red to add a nice argyll pattern.  I accented the pattern with some silver furniture tacks and acrylic flat backed rhinestone beads.   I painted the edges and feet with liquid silver leaf and sat back to admire my handiwork.  I have not quite decided what I want to do with the top of the table.  I am thinking about adding storage shelves on top, but am going to see what storage I will still need after I finish getting my workspace set up.  I am going to use the drawer to stash away my small fabric collection.  
Has anyone else transformed anything lately? If so, I would love to hear about it!

Friday, September 2, 2011

Craft Room Organization

I have been working on getting my craft room cleaned up and organized this past week.  I did not realize how bad it really got until I started pulling everything out and really looking at everything I have.  My bead stash was in the worst shape and it literally took me DAYS to get all of my beads sorted out and reorganized in individual containers.  Since I am still not finished with my craft room, I figured that I would share some pictures of lovely organized craft spaces that I found while browsing Pinterest. . .
I really like all of the colorful elements in this room.
Again, I love the colors and the dress form.  Someday I will own a dress form of my very own...
I love the chandelier and the wall storage.
I really love the way the thread is displayed on the wall.
I love the use of the wall space through shelving and decorative jars.
There are so many more inspiring craft rooms pictured on Pinterest.  I just typed "craft room" in the search box and spent more time than I would like to admit marveling at them all.  I hope to have some pictures of my own workspace to post next week.   Hope everyone has a happy and safe Labor Day weekend!


Wednesday, August 17, 2011

Dimensional Wall Mural Completed!

Well, it took me much longer than I anticipated but I am happy to announce that the dimensional wall mural has been completed and hung on the stairwell wall.  The installation did not go as smoothly as I had hoped but with the assistance of my hubby my vision was achieved. . . two hot glue burns and several choice words later.  It was one of those moments I was definitely glad we did not have kids because I would probably be paying for their therapy later.  Enough of my babbling.... here is the finished product!

     
 In order to make the birds, I kind of decided to wing it (no pun intended).  I looked at pictures of the bird I wanted to make and then started to ball up newspaper in the shapes needed.  I then wrapped the newspaper balls in masking tape.  In spots where more dimension was needed, I used cardboard which was also attached with masking tape.  Once I got the shape I wanted, I then took some of the CelluClay mixed with water and started slathering it on.  I was careful to try to smooth out the paper clay mixture as much as possible to avoid any unnecessary sanding.  I let my birds dry overnight, sanded them and painted with acrylic paints.  I used crystals for the eyes after trying several times to achieve the look I wanted with paint alone.
For the branches, I used cardboard paper towel rolls to make the larger and thicker portions.  I cut the rolls in half and started taping pieces together.  I then took newspaper and stuffed in the back and covered the entire form with masking tape.  For the smaller, thinner branches I rolled and twisted newspapers then covered in masking tape.  I then slathered on the paper clay mixture not really caring how jagged or uneven the texture got.  Once the paper clay was dry I used acrylic paints in varying shades of browns to add depth. In hindsight, I should not have made one huge piece to hang.  The weight of the upper branches made the main branch start to collapse in spots.  I ended up having to use wire on the back of my structure to provide more structure and stability and even then I had some issues.  If I were going to do this again, I would make smaller parts and then piece them together on the wall.
For the flowers, I took some heavy tissue paper and used a cherry blossom origami pattern.  To make the white centers, I took small bits of white tissue paper rolled into balls and glued with clear paper glue.
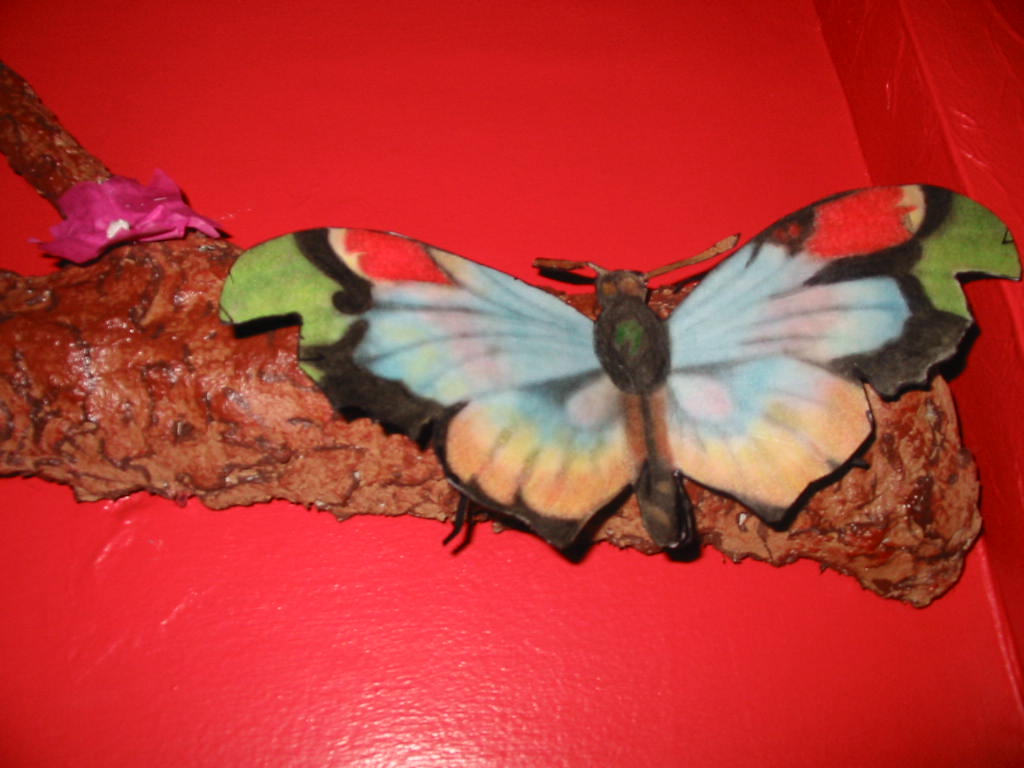
The butterflies are easier to make than they may look.  I started by searching for butterfly pictures on the internet.  Once I had a decent collection acquired in my Word document, I made a duplicate reversed image of each.  Once they were printed out, I took my markers and coloring pencils to help bring out any of the colors that were not as vibrant as I wanted. I then cut out the pictures and glued the matching pairs together and trimmed around edges as needed.  I then looked at a picture of butterfly legs and drew out some basic leg designs on black paper, cut them out and glued to underside of butterfly.
The nest I just came up with on my own.  I made a wire base and then wove twine around the wire base.  Once the twine completely covered the wire base, I wrapped and glued dried sphagnum moss across the nest.
After everything was completed, I sprayed with a gloss clear coat for protection.  I then utilized my glue gun and started tacking it up on the wall.  It is funny how easy it seems after just writing it out.  Either way it is done and I am relieved to be moving on to my next insane decorating idea.  Ok, honestly I am considering adding a few more branches toward the top of the stairwell to go over the door to Jason's office.  THEN I will be completely done with this project and moving onto the next goofy idea I can concoct.  At least I can easily reach the area I want to add branches to so my poor hubby does not have to get involved.
HAPPY CREATING!

Friday, August 12, 2011

Dimensional Wall Mural Nearly Accomplished!

I have finally completed the major components that make up my dimensional wall mural.  I will have to wait for my hubby to get home before I attempt to get on a ladder in our stairwell and make it a permanent fixture on the wall.  Here is the stairwell wall that it is going on...
                  
And....here are the preliminary pictures of the dimensional mural that is currently residing on a tarp in my entryway...


I am looking forward to posting updated pictures once the branch is up on the wall in all of its glory.  I will also explain the materials used to make all of the components at that time as well!  As usual, it took me longer than I planned but I am really pleased with the results.  Hope everyone has an amazing weekend!


Monday, August 1, 2011

9 Years and Going Strong . . .

I am working really hard to get the dimensional wall mural completed and posted by the end of the week.  On another note, I am also focusing on celebrating a very special time for my husband and I.  We are going to be celebrating our 9th wedding anniversary on Wednesday.  I would be lying if I said that every year has been filled with wedded bliss, but I can honestly say that right now I can look at my husband and know that I have a partner in life.  I am looking forward to many more years of learning and adventures with my best friend.
Married August 3, 2002 at Asbury United Methodist Church in Tulsa, OK