Well, it took me much longer than I anticipated but I am happy to announce that the dimensional wall mural has been completed and hung on the stairwell wall. The installation did not go as smoothly as I had hoped but with the assistance of my hubby my vision was achieved. . . two hot glue burns and several choice words later. It was one of those moments I was definitely glad we did not have kids because I would probably be paying for their therapy later. Enough of my babbling.... here is the finished product!


In order to make the birds, I kind of decided to wing it (no pun intended). I looked at pictures of the bird I wanted to make and then started to ball up newspaper in the shapes needed. I then wrapped the newspaper balls in masking tape. In spots where more dimension was needed, I used cardboard which was also attached with masking tape. Once I got the shape I wanted, I then took some of the CelluClay mixed with water and started slathering it on. I was careful to try to smooth out the paper clay mixture as much as possible to avoid any unnecessary sanding. I let my birds dry overnight, sanded them and painted with acrylic paints. I used crystals for the eyes after trying several times to achieve the look I wanted with paint alone.
For the branches, I used cardboard paper towel rolls to make the larger and thicker portions. I cut the rolls in half and started taping pieces together. I then took newspaper and stuffed in the back and covered the entire form with masking tape. For the smaller, thinner branches I rolled and twisted newspapers then covered in masking tape. I then slathered on the paper clay mixture not really caring how jagged or uneven the texture got. Once the paper clay was dry I used acrylic paints in varying shades of browns to add depth. In hindsight, I should not have made one huge piece to hang. The weight of the upper branches made the main branch start to collapse in spots. I ended up having to use wire on the back of my structure to provide more structure and stability and even then I had some issues. If I were going to do this again, I would make smaller parts and then piece them together on the wall. For the flowers, I took some heavy tissue paper and used a cherry blossom origami pattern. To make the white centers, I took small bits of white tissue paper rolled into balls and glued with clear paper glue.
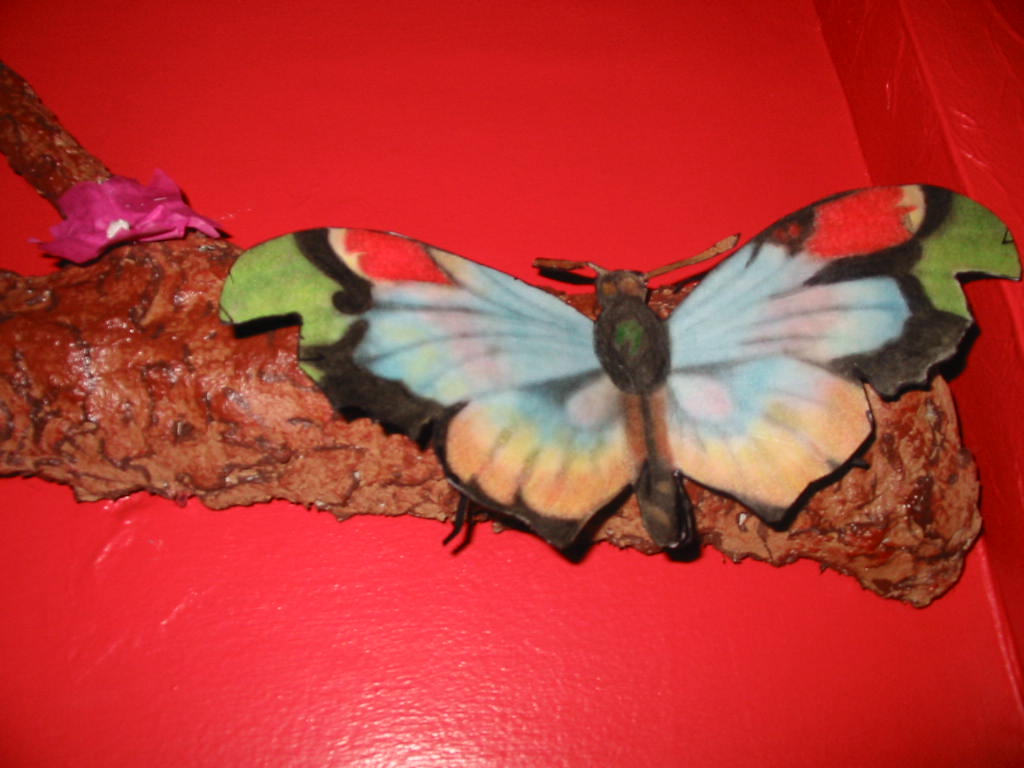
The butterflies are easier to make than they may look. I started by searching for butterfly pictures on the internet. Once I had a decent collection acquired in my Word document, I made a duplicate reversed image of each. Once they were printed out, I took my markers and coloring pencils to help bring out any of the colors that were not as vibrant as I wanted. I then cut out the pictures and glued the matching pairs together and trimmed around edges as needed. I then looked at a picture of butterfly legs and drew out some basic leg designs on black paper, cut them out and glued to underside of butterfly.
The nest I just came up with on my own. I made a wire base and then wove twine around the wire base. Once the twine completely covered the wire base, I wrapped and glued dried sphagnum moss across the nest.
After everything was completed, I sprayed with a gloss clear coat for protection. I then utilized my glue gun and started tacking it up on the wall. It is funny how easy it seems after just writing it out. Either way it is done and I am relieved to be moving on to my next insane decorating idea. Ok, honestly I am considering adding a few more branches toward the top of the stairwell to go over the door to Jason's office. THEN I will be completely done with this project and moving onto the next goofy idea I can concoct. At least I can easily reach the area I want to add branches to so my poor hubby does not have to get involved.
HAPPY CREATING!


